
Nearly every software company uses different environments for various stages of their code — local, development, staging, review, and production, to name a few.
For example, you might use a staging environment to host the app you’re about to deploy to production as you do one last spot check or run your test suite against it. Or you might use review apps as part of your code review process so that reviewers can easily confirm the app is working properly with the changes contained in the pull request.
Staging and review environments differ from production environments in that they are temporary non-customer-facing environments and are only needed when they’re actively in use. A review app, for example, might exist for the life of the pull request as a developer prepares to merge their code into the main branch. If the pull request stays open for three days, the review app is up for that same period of time, even though an engineer might only use the review app for a few minutes during their review.
Hosting your app costs money, and leaving these staging and review environments running while not in use is the equivalent of throwing money down the drain. This is especially true with IaaS and PaaS providers like Heroku, where resource costs are prorated to the second. Companies that are strapped for money might even choose not to use review apps in an attempt to save some money if the cost of these resources becomes prohibitive. This very well may be the main reason why any given engineering organization chooses not to use review apps as part of their code review process.
This begs the question: Is there a way that we can use review apps and still ensure we’re not paying for resources we don’t need?
In this article we’ll look at how we can configure a Heroku project to use review apps. We’ll then add the AutoIdle Heroku add-on to demonstrate how we can cut down on our costs.
Creating a New Heroku App
First, we’ll clone a GitHub repo, install its dependencies, and start the app locally. You can find the sample repo here.
git clone https://github.com/autoidle/heroku-review-apps-and-autoidle.git
cd heroku-review-apps-and-autoidle
npm install
npm start
Next we’ll turn this project into a Heroku app by logging in to the Heroku CLI, creating the app, deploying it to Heroku, and opening it in our browser.
heroku login
heroku create # or `heroku create <app name here>`
git push heroku master
heroku open
Here’s what the app looks like so far:

You can view the app hosted on Heroku here.
Creating a Heroku Pipeline
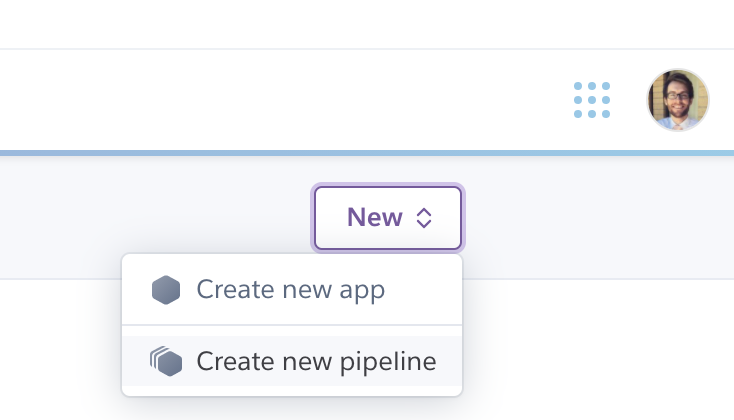
Now that we have our Heroku app, let’s create a Heroku pipeline. In our Heroku dashboard, we can click the “New” button, and then select “Create new pipeline” from the dropdown menu.
We’ll give our pipeline a name, connect it to our GitHub repo, and then click “Create pipeline.”
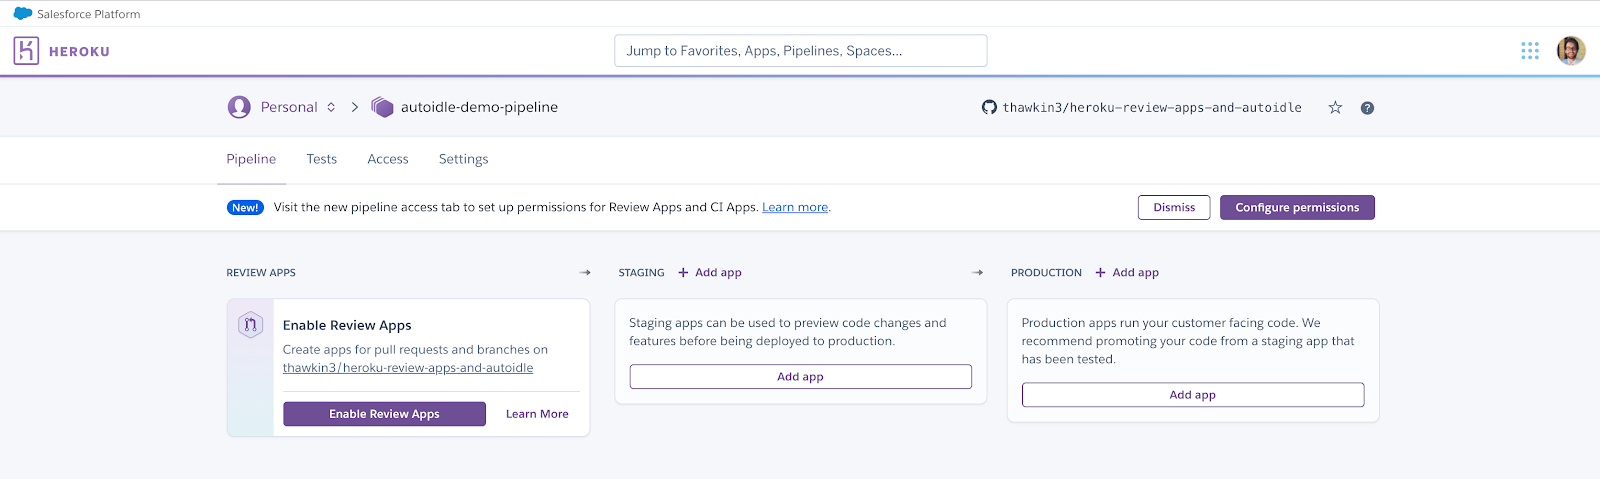
Enabling Review Apps for Our Pipeline
With our pipeline in place, we’re now ready to enable review apps for it. We’ll simply click the “Enable Review Apps” button to get started.
Next we’ll be shown a screen which allows us to configure our review app settings. Let’s choose to automatically create new review apps for each new pull request on our GitHub repo. Let’s also choose to automatically destroy any review apps after they have been open for more than five days.
Once we’re done configuring our review app settings, we’ll click the “Enable Review Apps” button at the bottom of the screen to complete the setup.
Creating Our First Pull Request and Review App
It’s time to make our first pull request. Let’s create a new branch, add some more content to our index.html file, commit the changes, and push to our branch.
git checkout -b feature/steps
# make changes to the `index.html` file
git add .
git commit -m "feat: adds steps for creating a review app"
git push --set-upstream origin feature/steps
We can then navigate to our GitHub repo to create a pull request to merge our feature branch into the master branch.

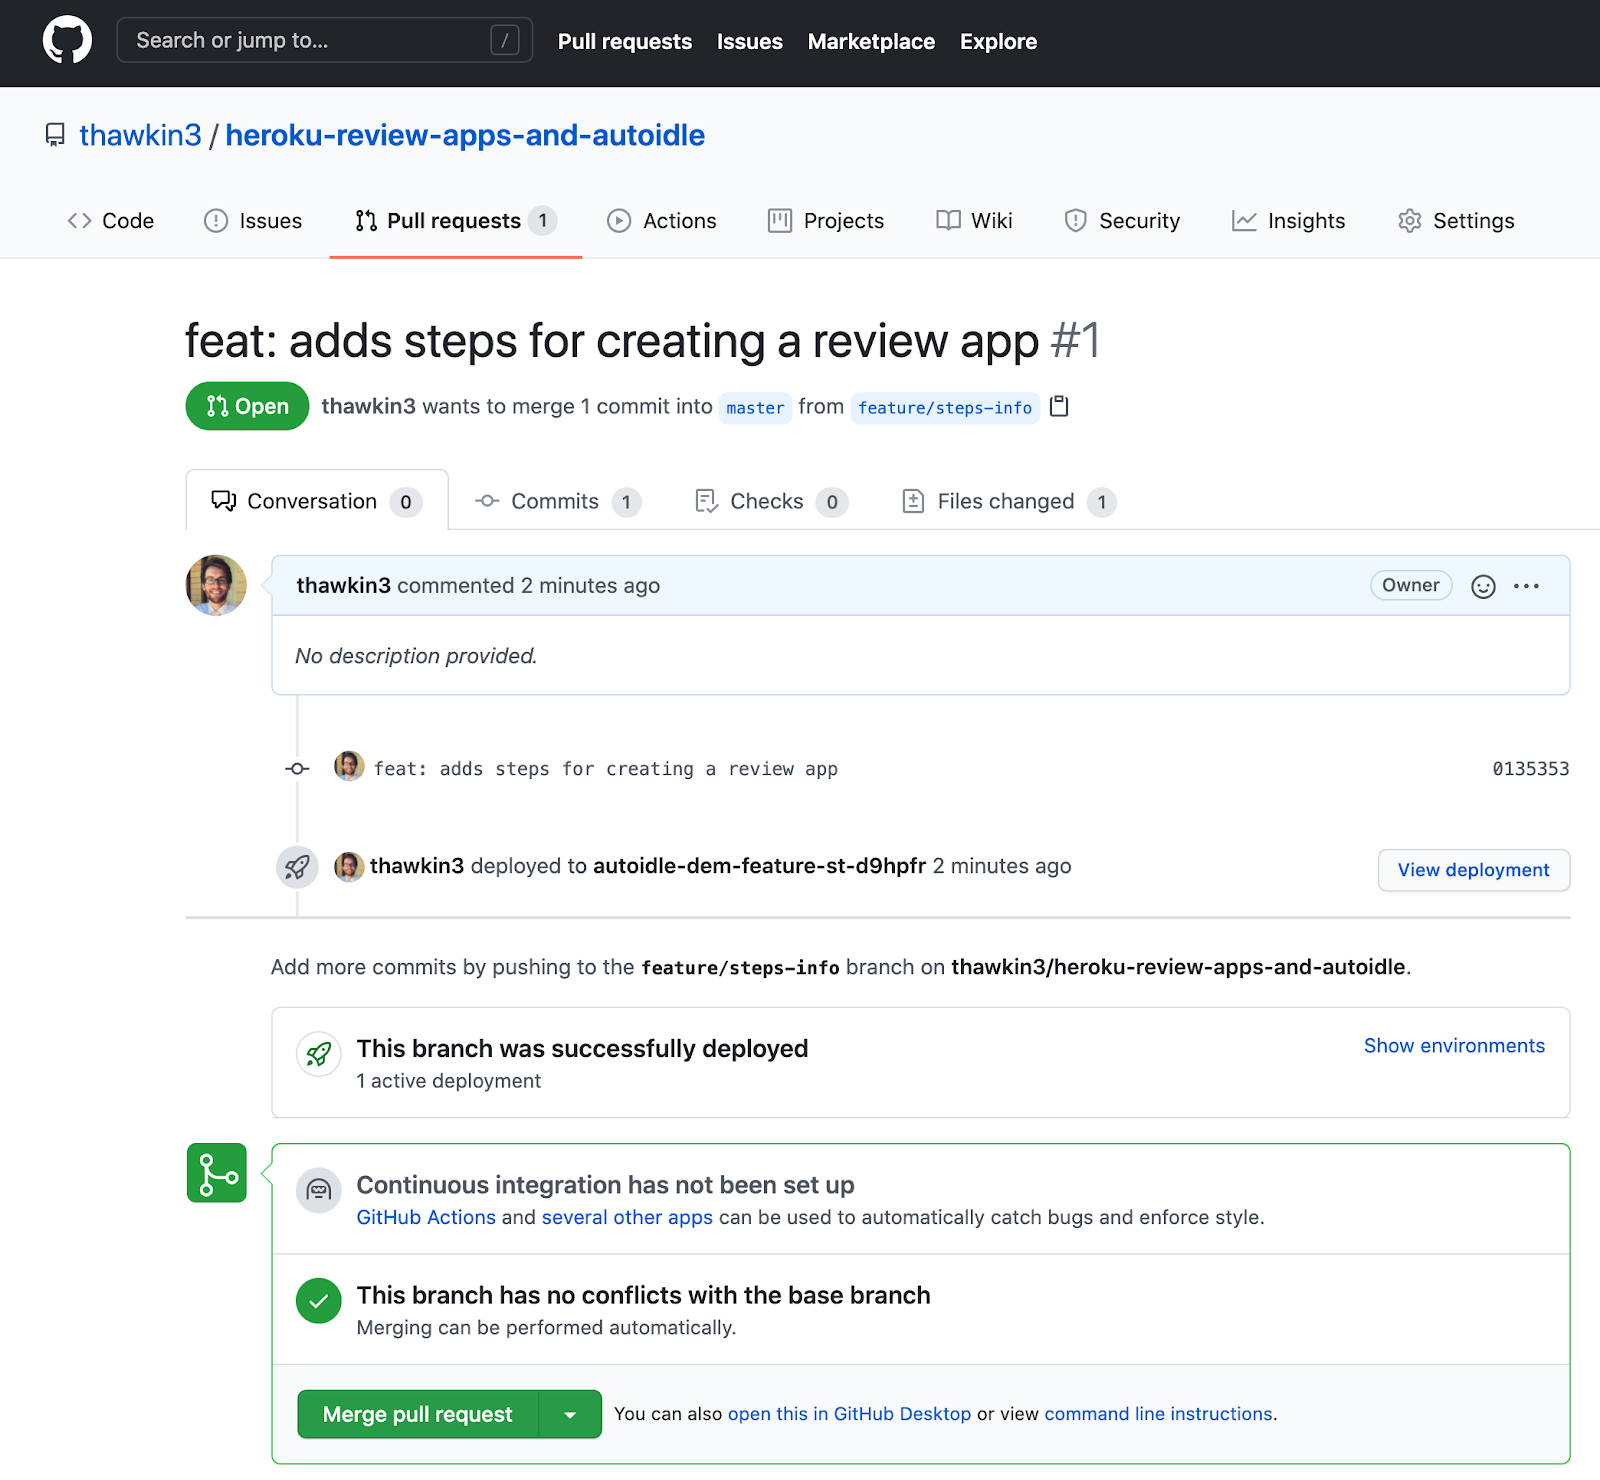
After filling out the pull request, we’ll see a comment showing that a new review app deployment is pending.

How exciting! If we navigate over to our Heroku pipeline dashboard, we can see the resulting review app once it’s successfully deployed.

We can open the review app from the Heroku pipeline page using the “Open app” button, or we can navigate back to our pull request in GitHub to find the “View deployment” button.
Clicking either button will take us to our review app, which contains a preview of our new changes.

After ensuring that our app looks good, we can then merge the pull request. Merging the code causes the review app to be destroyed, leaving us with just our regular production app now.
Review apps are a wonderful thing!
After merging our code to the master branch, we can now release this code to production using the git push heroku master command from our terminal. Or, for a more realistic scenario, we might promote our code to a staging environment or automatically deploy the code to production after merging. We won’t consider those workflow setups for the purpose of this article though.
The Dilemma
Now, when it comes to costs, it’s important to remember a couple of things. First, review apps stay alive until the pull request is either merged or closed, or once the maximum time period has elapsed that we specified in our review app settings. (You’ll recall that we configured our review apps to be automatically destroyed after five days.) Additionally, you are charged for review apps just like any other Heroku resources, prorated by the second.
So imagine that a developer creates a pull request on a Friday afternoon. This kicks off a new review app deployment. Then everyone goes home for the weekend while the lonely review app sits unused. On Monday, another developer sees the pull request, reviews the code and manually tests the review app, approves the pull request, and then merges it.
In this scenario, the review app was active all weekend, which means you’re charged for the resources it used, even though the review app was never really needed during that time. In reality, the review app was only necessary for a few short minutes during the code review.
And if that sounds bad, imagine this scenario multiplied by hundreds of repos and hundreds of developers. Depending on the size of your company, these costs can add up quickly!
Wouldn’t it be nice if we could put our review apps to sleep when they’re not in use?
AutoIdle to the Rescue
AutoIdle is a Heroku add-on that automatically puts your staging and review apps to sleep after 30 minutes of inactivity. When an HTTP request finally is received, AutoIdle reactivates the app. This is perfect for temporary apps that really don’t need to stay active all the time. (Production apps, of course, do need to be available at any given time, so AutoIdle should not be used for your production environment!)
Installing AutoIdle
We can add AutoIdle to our app by running the following command in our terminal:
heroku addons:create autoidleAnd… that’s it! There are no more steps. AutoIdle is now installed and ready to save you some money.
However, it’s important to note that the above command adds AutoIdle to your actual app, not your review apps. So if this app is a customer-facing production app, you should not add AutoIdle here! This command is perfect though for adding AutoIdle to staging apps or other non-customer-facing apps that are ok to sleep while inactive. In the event that you need to remove the AutoIdle add-on, you can always do so using this command:
heroku addons:destroy autoidleSince we want to add AutoIdle to only our review apps in our case, we’ll instead specify our add-on in the app.json file at the root level of our repo. The following snippet of JSON specifies that for our “review” environment we want to use the “autoidle:hobby” add-on.
"environments": {
  "review": {
    "addons": ["autoidle:hobby"]
  }
}
A full list of AutoIdle plan types can be found here.
Now that we have AutoIdle configured for our review apps, let’s create another pull request just like we did before. Once we have a pull request created, our review app will be automatically deployed.
We can then view our AutoIdle dashboard by running this command in our terminal:
heroku addons:open autoidleOur dashboard initially looks like this:

Our review app was just created, so it’s currently running. Let’s wait at least 30 minutes without interacting with our review app to see AutoIdle work its magic.
30 minutes later… our app has been stopped. Nice!
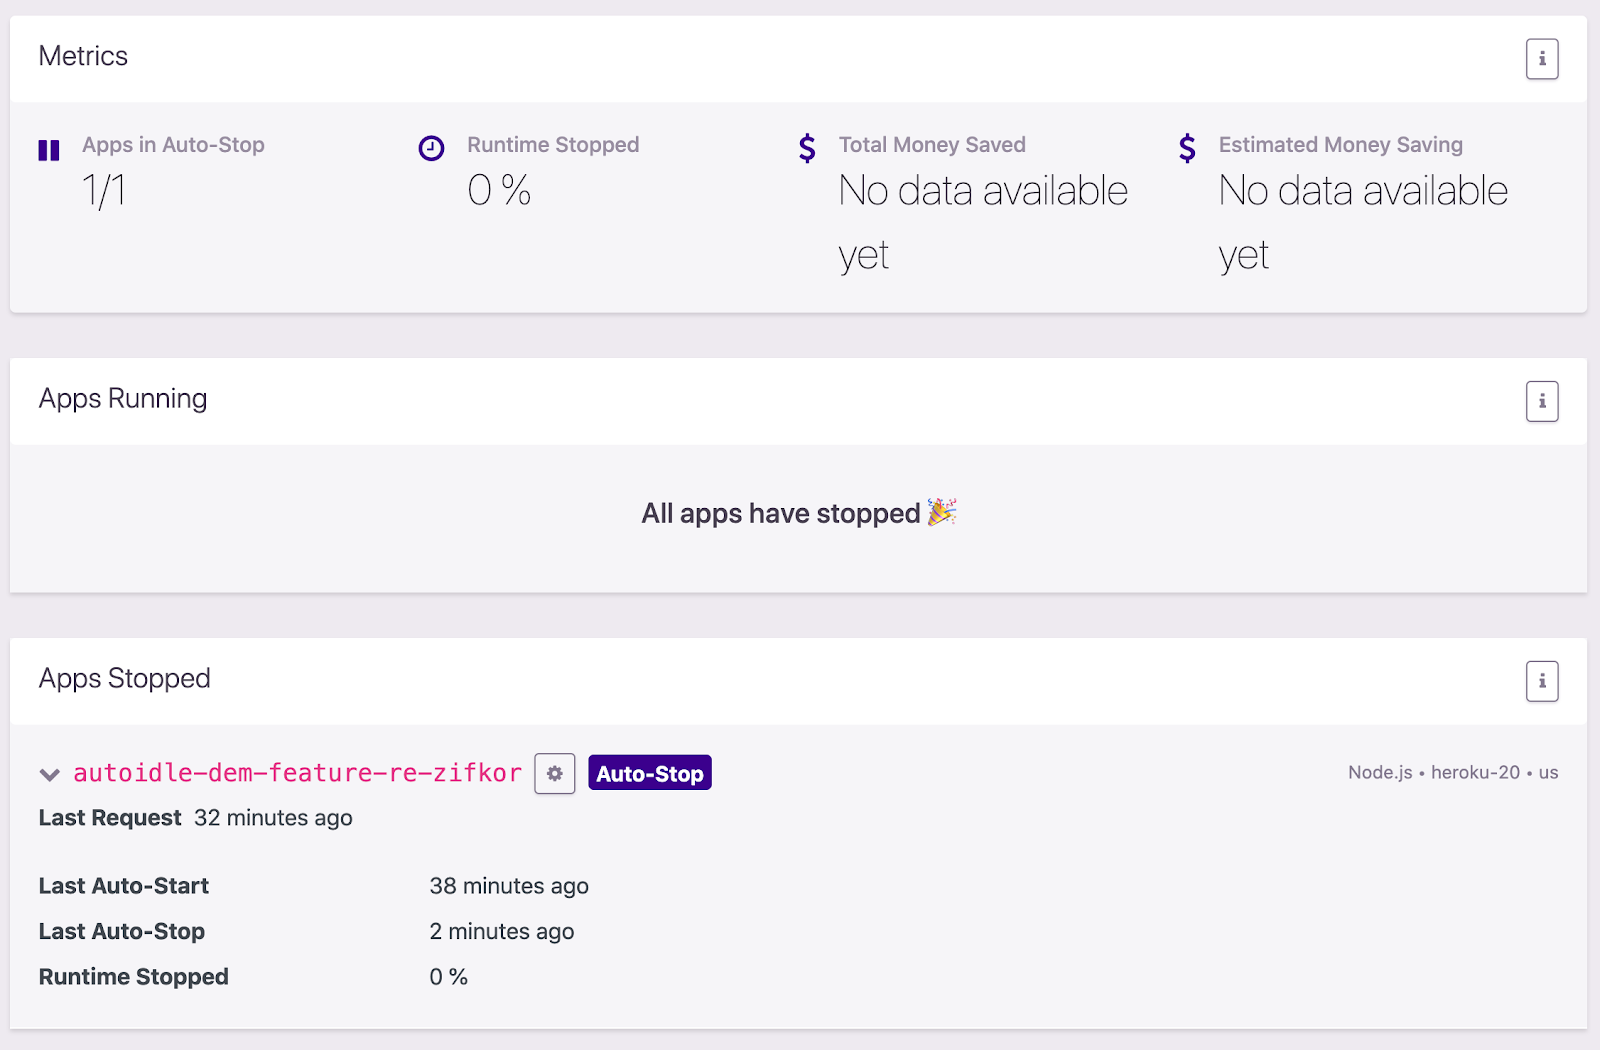
Now let’s wait a few more hours so we can begin to see the savings AutoIdle will generate for us. I created this review app late at night, so let’s see what the dashboard looked like when I checked it the next morning:
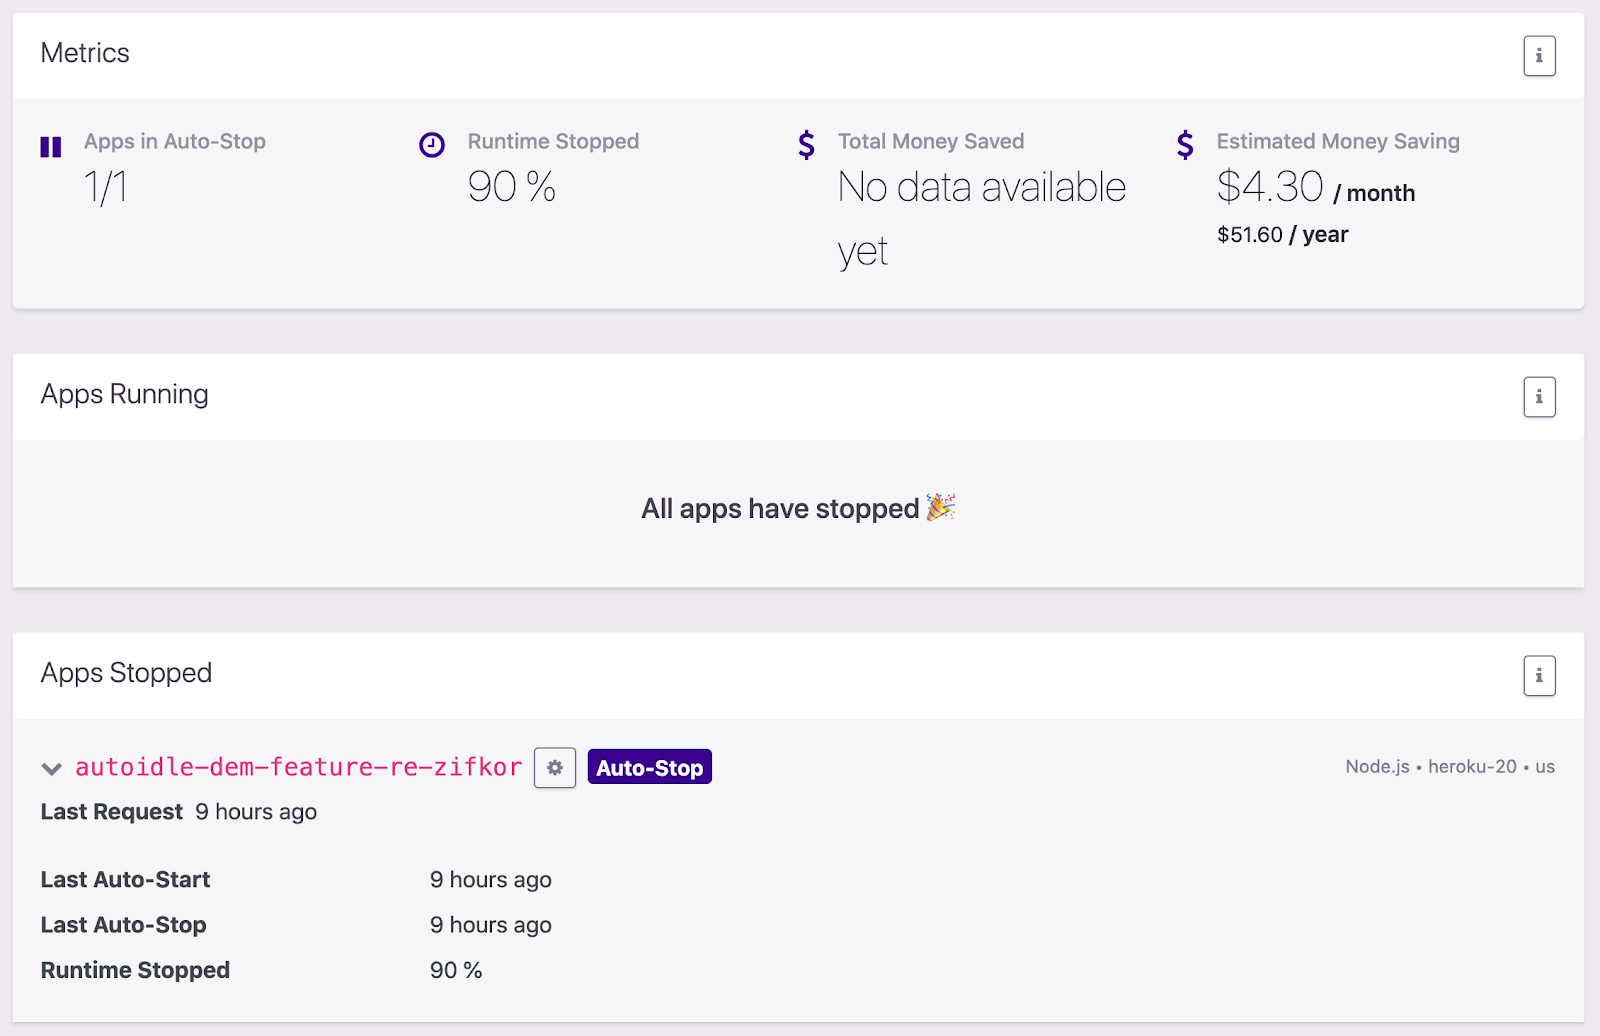
As you can see, our app has been stopped for 90% of the time (it was running for one hour and then stopped for nine hours overnight). We currently have an estimated monthly savings of $4.30 per month. But keep in mind that this is only for one Hobby dyno review app that we’ve been using for less than a day.
Imagine if we had 100 review apps. Now we have an estimated monthly savings of $430 per month! That’s nice to know we’re not paying for all this downtime when we weren’t using our app!
If we now attempt to view our review app at the herokuapp domain, we get an error screen:

This is because our review app is still sleeping. It usually takes about 5–10 seconds for the app to wake up after this first request. Once that time period has elapsed, we can refresh our screen and see our app working normally again.

One way to avoid this initial error page is to use the autoidleapp domain instead of the <span data-slate-string="true">herokuapp</span> domain for our app. In our case, rather than visiting https://autoidle-dem-feature-re-zifkor.herokuapp.com, we can visit <span data-slate-string="true">https://autoidle-dem-feature-re-zifkor.autoidleapp.com</span>. It’s the same app, but now with no first page load issues.
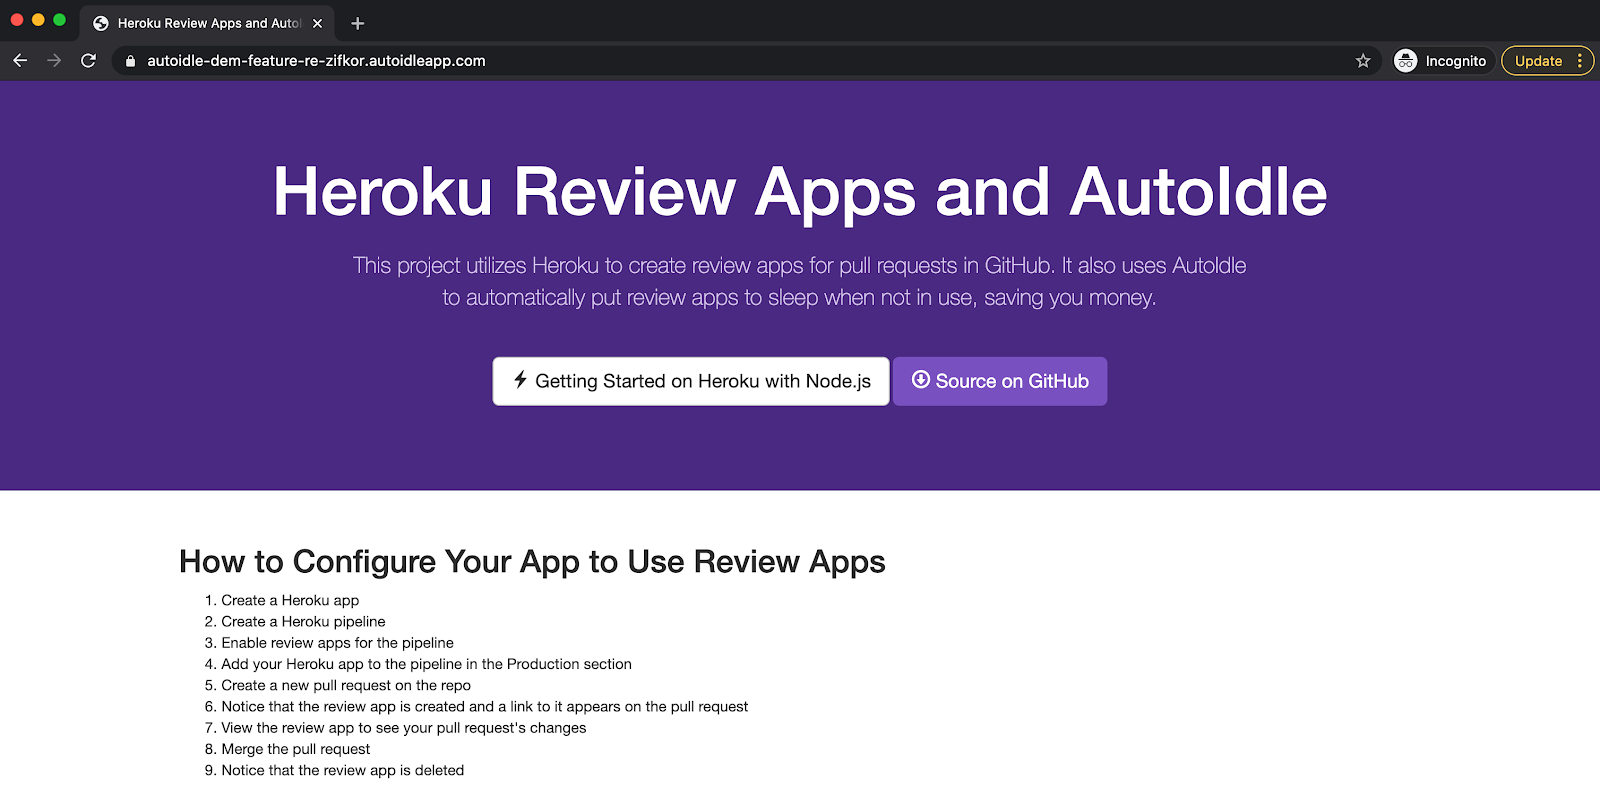
Now that our review app is active again, if we check out our AutoIdle dashboard, we’ll see that our review app is no longer sleeping.
Conclusion
Review apps are incredibly useful for validating changes during pull request code reviews. But leaving them up and running for long periods of time can cost you money. In our example, we had a single app and a single pull request. We’re also using a lower tier Hobby dyno. In our case, our costs would be relatively low. But imagine using review apps at an enterprise software company. With hundreds of engineers, pull requests, and review apps, all using large dynos and additional Heroku add-ons, the costs can really add up.
By using AutoIdle, you can keep your apps alive only when necessary, which will drastically cut down your Heroku bill.
This article was originally published on