MySQL is a popular free and open source relational database that is widely used in many applications with Relational Database Management System(RDBMS) requirements. In this article, we shall see how we can build an application on Heroku that uses MySQL for free. We shall be using ClearDB, a free MySQL add-on on Heroku. We explore more on Heroku MySQL database add-ons later in this article. With that stated, let us dive in.
Tutorial
Setting up on local environment
Prerequisites
Before we start, we shall be using some tools and it would be best to have these installed before hand.
- Heroku CLI: We shall be deploying our application from the Heroku CLI and so to follow along from the Creating application with heroku cli step, you will need to have Heroku CLI pre-installed. To download and install it, use the options here depending on your operating system.
- Mysql: If you intend to run the application locally, you’ll need to have the MySQL database installed for the application to run locally. Follow this guide to install it on your operating system.
- Node.js & npm: You will also need to have both node.js and npm installed in order to run the application locally. You can install both from a node installer following the steps here.
- Newman CLI: Newman cli is a collection runner for Postman. If you would like to run the application’s test script on your computer, you’ll need to have Newman installed. Do so by simply running the command.
npm install -g newmanSetup
To begin, fork this repository and clone your forked repository onto your computer.
$ git clone https://github.com/autoidle/nodejs_mysql.gitMove into the created directory and install the project dependencies with the commands below.
$ cd node_mysql$ npm installStart the server by running the start script npm start .
$ npm start

> nodejs_mysql@1.0.0 start
> node server

Server is running on port 3000.
Successfully connected to the database.
Open another terminal and concurrently run the test script npm run test to confirm that everything is working fine.
$ npm run test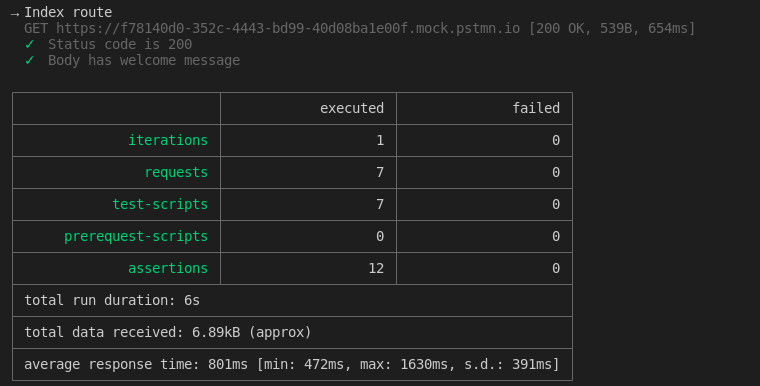
All tests passed
We can access our application in from the browser or postman.

Accessing the application from the browser
The setup is complete and now we can now deploy our application to Heroku.
Deploying the application on Heroku
Adding Procfile
To deploy our application, we shall create a heroku app locally first and then publish it to heroku. But first, we need to add a Procfile at the root of our project which will tell Heroku how to run our application. To do so, run the command below in your terminal.
$ echo "web: node server.js" >> ProcfileAdd and commit the changes to the app
$ git add .
$ git commit -am "Add Procfile"
Creating application with heroku cli
Create the Heroku app by running the command below substituting “app-name” with the name you want to give to your app.
$ heroku create app-name
Deploying application with Heroku cli
Push your local git repository to the heroku git repository to deploy the application with the command
$ git push heroku main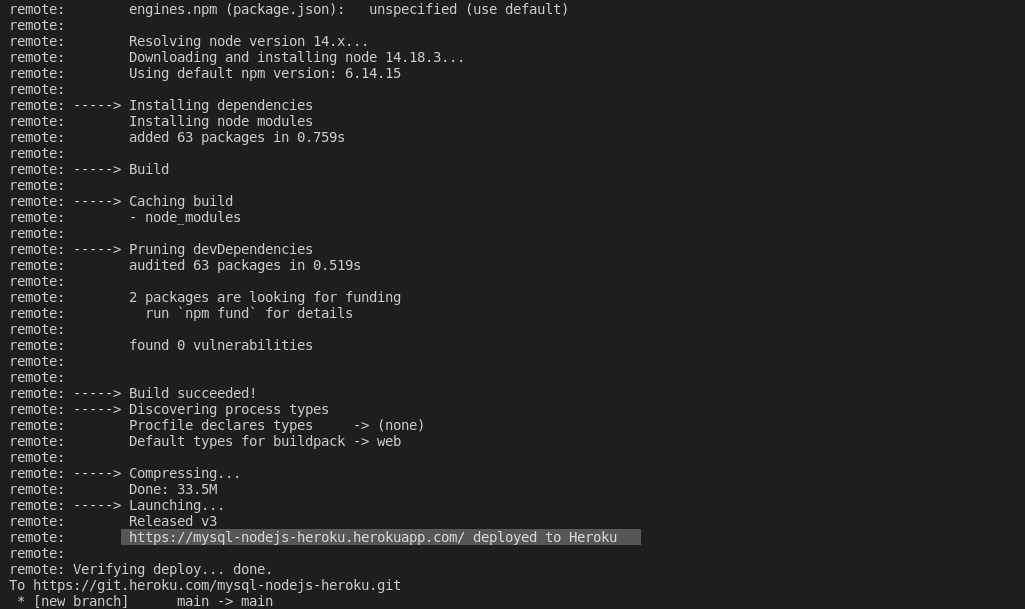
Application deployed successfully
Our application has been deployed successfully and can be found at the link provided. However, we are not yet done and making a request to the provided uri should show you the Heroku error below.
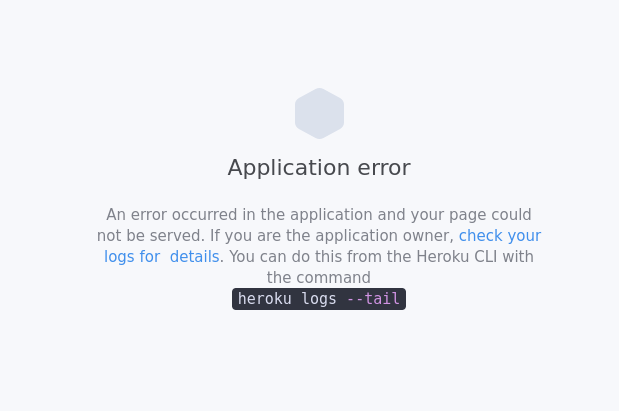
Application returns error page when a request to it is made
We have this error because we haven’t set up our database.
Adding ClearDB to application
To complete our application deployment to Heroku, we need to add a database for it. Heroku provides various MySQL database add-ons from which we can choose for our application. In this tutorial, we shall use ClearDB. ClearDB is a highly available MySQL database-as-a-service that runs on multiple cloud computing platforms including Heroku. We shall further cover ClearDB in detail later on under Heroku MySQL database addons. For now, let's focus on adding the add-on database to the application. We are going to add the free plan(ignite) of ClearDB to our application from the Heroku Cli by running the command below.
$ heroku addons:create cleardb:ignite
Note: Your account must to be verified before you can add any add-on to your Heroku applications.
ClearDB add-on added to app
Before we can add our environment variables we need retrieve our created ClearDB database uri, we shall use the command:
$ heroku config | grep CLEARDB_DATABASE_URLThe output will be in the format
mysql://USER:PASSWORD@HOST/DATABASE?reconnect=true
Obtain the connection (environment) variables from the uri as guided above ie USER, PASSWORD, HOST, and DATABASE.
We can now set the environment variables for our application with the commands below. Substitute USER, PASSWORD, HOST, and DATABASE with the values obtained above.
$ heroku config:set DB_USER=USER
$ heroku config:set DB_USER_PASSWORD=PASSWORD
$ heroku config:set DB_HOST=HOST
$ heroku config:set DB=DATABASE
Alternatively, since we are using ClearDB, we could change our application code to automatically use the CLEARDB_DATABASE_URL variable directly without having to manually set the USER, PASSWORD, HOST, and DATABASE as above. You can do this by changing the mysql createConnection function to use a connectionDetails function which returns the CLEARDB_DATABASE_URL variable if existent as shown in the models/db.js file below.
const mysql = require('mysql');
require('dotenv').config();

// Sets the right connection details for the connection string available
const connectionDetails = () => {
  // Check if heroku CLEARDB_DATABASE_URL is available
  if (process.env.CLEARDB_DATABASE_URL) { return `${process.env.CLEARDB_DATABASE_URL}`; }
  return {
    database: `${process.env.DB}`,
    host: `${process.env.DB_HOST}`,
    user: `${process.env.DB_USER}`,
    password: `${process.env.DB_USER_PASSWORD}`,
  };
};

// Create a connection to the database
const connection = mysql.createConnection(connectionDetails());

// open the MySQL connection
connection.connect((error) => {
  if (error) throw error;
  // eslint-disable-next-line no-console
  console.log(`Successfully connected to the database with ${connectionDetails()}.`);
});

module.exports = connection;
We can now test our endpoints in postman
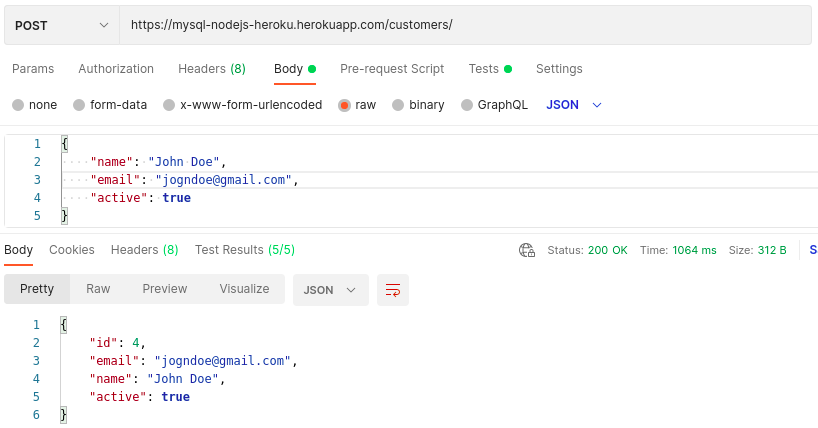
Creating user
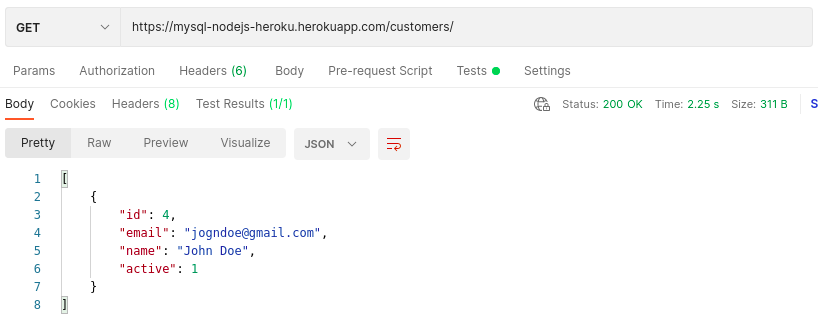
Getting all users
Tadaa! Our free mysql heroku application is successfully deployed and running.
Heroku MySQL database add-ons
ClearDB
ClearDB is a highly available MySQL database-as-a-service that runs in multiple cloud computing platforms. On Heroku, ClearDB offers various plans starting from the free ignite plan herein which we used in our application.
Pros
- Supports multiple app installs.
- Available on various cloud computing platforms like AWS, GCP, Azure.
- Daily backups on the free plan.
- Easy to scale.
- Fault tolerant
- Up to 10 connections on free plan
- Supports MySQL, MariaDB, and PostgreSQL
Cons
- Database not sharable among applications.
- Provides only 5MBs of storage for the free plan.
JawsDB
JawsDB is a Heroku add-on for providing a fully functional MySQL Database server for use with a Heroku application. JawsDB only works on Heroku and also offers multiple pricing plans starting with the free Kitefin Shared plan.
Pros
Database shareable among applications.
Supports multiple app installs.
Easy to scale
Up to 10 connections on free plan
Cons
- Provides only 5MBs of storage for the free plan.
- Only one day backup retention on the free plan.
- Supports only MySQL and MariaDB
Heroku Postgres
Although we are covering MySQL databases on Heroku, it is also important to note that it is highly recommended to use Heroku Postgres as a relational database choice for Heroku apps because of its tight integration with the platform even though MySQL is a very popularly used relational database. Of the three covered, Heroku Postgres is the most popular Heroku add-ons.
Pros
Database not sharable among applications.
Supports multiple app installs.
Up to 20 connections on free plan
Up to 1GB of storage on the Hobby free plan
Tight integration with Heroku.
Cons
Only available on Heroku
Supports only PostgreSQL
Conclusion
We looked at how to deploy a MySQL database application totally free of charge. We can appreciate with how much ease we achieved this on Heroku and that is perhaps why it’s a run to PaaS for many developers looking to get up and running within the shortest time possible. Ideally, Heroku has an add-on for anything you’ll ever need for your application and you can explore more of its add-ons from their marketplace here.
I hope you enjoyed this post and you’d go ahead to share it with someone you think will find value from it.
Happy saving!

